Sep 23, 2013

Hello plushionistas, it's been a while!

When out shopping recently, I noticed the wave of prints overtaking retail outlets - from loud, colourful geometric prints to aztec-inspired prints to subdued hues, from dresses to maxi skirts and even leggings!

Thus, I present to you my Plus Size Fashion Wishlist + some styling tips cultivated from hours of online browsing.

1. Colour Me Up


For plus sizers, prints can something of a hit and miss. Some even forbid horizontal prints for fear of the 'plus size myth' which can make our bodies appear larger. But I'll say: Take a chance - you might find some ferocious prints that flatter.

If you're curvy, go for bodycon dresses that hug your curves. Another good way to hide bulges and emphasize shape is with a top-fitted dress that flows down from the waist onwards.

Styling tip: Since the prints are loud - skip the accessories and go for a simple nude or black pump. To cover up sleeveless versions, throw on a simple black blazer and you're good to go.

Left: A Line Crinkle Maxi Dress from Roamans
Right: Junarose Printed 3/4 Sleeve Midi Bodycon Dress from Asos Curve

2. Sashay Skirts


Or if you're slightly intimidated by a printed dress, try going for skirts instead. I love these flowy, beachy skirts that ooze simplicity and style.

Banish frumpiness by tucking in your top and throwing on a belt, ensuring that the skirt sits higher on the waist for proportion. If the wider part of the skirt lands too low on your hip, it might make your hips seem larger.

Styling tip: Pair these funky skirts with a non-descript top, simple necklace and gladiator flats for that laid-back Bohemian look!


 3. Black & White


Be the star of a Charlie Chaplin movie with these classic black & white printed dresses. Perfect for any occasion - be it work, school, a date or even cocktail party!

Styling tip: Balance black and white with neutral tones such as a tan belt, simple bracelet and comfy wedges.

Left: Skater Dress in Bird Print from Asos Curve
Right: Monotone Shift Dress from Trendy Confessions

4. Colour Blocking


Inject some colour into your wardrobe with these simple colour-blocking pieces. I love how these dresses subtly add elegance and flair without going all out.

Styling Tip: Let the colours be the hero. For bodycon dresses, pair with leggings and boots on a chilly day, or show off those legs with a neutral strappy heel.

Left: Colourblock Tunic from Roamans
Right: Junarose Graphic Stripe Print Midi from Asos Curve


5. Printed Kicks


Right: Jersey Leggings from H&M


Leggings are a must-have in any wardrobe. Versatile and fashionable, you can dress these up or down for almost any occasion!

For curvy fashionistas with a heavy bottom, try wearing a longer top to balance your figure. Ensure that the top ends just below your derriere (mid-thigh) and not below the knees, as it may make you appear shorter.

Styling tip: General rule of thumb for loud leggings - keep the top simple to avoid overcrowding. Black, white, grey or neutral works best with colourful leggings.


Well, I hope you enjoyed reading and happy printing!
Till next time, stay fabulous! xx

Sep 1, 2013

Aloha! How have you been? I've been loving the cool tropical weather in Malaysia recently, but my skin - not so much.

As mentioned in previous posts, I have the dreaded curse of sensitive, dry combination skin, which means parts of my face (forehead, cheeks and chin) can get dry and flaky while other parts (nose area) remains relatively normal. It's been a struggle finding the best skincare products - I've tried countless moisturizers - some of which stung horribly and left a patchy redness, and others were simply absorbed by my skin in seconds.


Check out the dry skin around my forehead and laugh lines - even after slathering on moisturizer!

I guess what I truly needed was a cream/oil-based moisturizer but at the same time I didn't want to end up looking like a greasy mess.

Alas, the condition got worse about a month ago, probably due to round-the-clock air conditioning, a poor diet, stress and what not. I went on a desperate moisturizer hunting spree in KL and as per my colleague's advice, finally decided on the new Clinique Dramatically Different Moisturizing Lotion +.


This 50ml bottle costs RM68 from Sephora, however considering I'd only need to apply a small dab per usage, it is relatively budget-friendly. On websites and reviews, the texture is often described as silky - and on my dry skin I would agree that it feels smooth and silky - not at all thick or greasy. Then again, it's built for Very Dry to Dry Skin, and if you have Normal/Oily skin, you might find it a tad greasy for your liking. 

I also love the subtle scent, not too overpowering for daily use. After applying this lotion for two weeks, I noticed a drastic change in the texture of my skin. The flakes are gone, and the redness has decreased significantly.


 Look! No more flakes!


Another product that has become a staple in my skincare regime is the Mizon Multifunctional All-In-One Snail Repair Cream. I first came across this cream while browsing on Qoo10. Apparently it's the No. 1 Best Selling snail cream in Korea with 92% snail secretion.

If you're hearing about snails and skin care for the first time, don't be alarmed. I know it sounds disgusting at first - that was my exact reaction - but it turns out snail slime is proven to have miraculous skin benefits for healing and repair. The cream also claims to help skin recover, reduce the appearance of wrinkles, trouble spots, pores, provide hydration and soothe skin.

Say no more - I was immediately enticed by the cream (plus it was on offer at RM54.60 excluding shipping!) and placed an order via Qoo10. The cream finally arrived 3 weeks later via Korea Air Mail.


The flakes & redness - GONE!


The website describes the texture as 'chewy' and 'elastic', which is quite true! It glides on the skin smoothly and is absorbed in seconds, but does not leave skin feeling taut or tight. I love the fact that it also leaves a healthy after-glow and radiance which lasts for a few hours.

I typically use this right out of the shower, followed by the Clinique lotion to seal in moisture. Definitely my best skincare combination thus far! 


For days when I crave something refreshing and cooling - I apply some Bioglo Skin Perfecting Moisturiser with Pure Aloe (Price: approx RM25+ from Cosway). It doesn't do much in terms of moisture, but it definitely soothes the skin and smells absolutely heavenly.


For toner, I use the Hada Labo Hyaluronic Acid Moisturising Lotion (Price: approx RM35++) - which doesn't need much introduction for it's hydrating properties.


And as for cleanser, the Cetaphil Gentle Skin Cleanser does wonders for my sensitive skin. No more tight, 'squeaky clean' skin! It retails for about RM25+ at local drugstores :)


Before I end, here are some skincare tips for dry skin:

  1. Avoid scrubbing your face with a towel. Use gentle dabbing motions and seal in moisture immediately after showering.
  2. Avoid using hot water when cleansing - it strips skin of natural oils. Lukewarm or cold water works best!
  3. Mask up - take three tablespoons of instant oats, soak in half a cup of water and drain. Add honey, mix well and you've got a soothing homemade mask! Leave on for 15-30 minutes and rinse off.
  4. Less is more - Lathering on too many heavy creams may clog pores. Try applying a dab of Vitamin E oil followed by a lightweight moisturizer instead.
What are some of your skincare tips? Share with me!


Well, that's all for today's post! Thanks a million for reading - and I hope this post was helpful in some way for you! Till next time, stay beautiful! :)

Aug 18, 2013

Hello fashionistas! How was your weekend? I know I'd promised to blog more often (at least one post per week), and preferably with more fashion content - so here's my review on Trendy Confessions, an online Plus Size store!

A couple of weeks ago, the lovely Jiar sisters left a super sweet comment on my post about Plus Size Shopping. I hadn't been on Trendy Confessions for some time, but HUGE PROPS to Jiar Yi & Jiar Hwei for the incredible new collections! Plus, they have sales from time-to-time!

Love the colour schemes, patterns & cuts - and they have sizes up to UK24! Simply couldn't resist picking up a few trendy items to add to my wardrobe.

The parcel arrived neatly packed in a plastic bag, sealed with a Trendy Confessions sticker! How chic!

The first item I chose - a Bodycon dress with blue sleeves (RM44.25 after discount) - which fits perfectly! Very impressed with the superior quality material, inner lining and amazing fit. Perfect with my silver necklace from Lovisa (RM29) & black open-toed wedges from Walk In.

Item 2 is a pair of Galaxy Skorts (RM59). Yes, you read that right - skorts: combination of a Skirt & Shorts. Makes a statement yet super comfy when paired with a white cotton tee!


Got my skorts - ready to head out!

Overall, I'm very pleased with the friendly service and quick delivery from Trendy Confessions - thank you to the Jiar sisters for getting in touch! I like the fact that they're always easily accessible via Instagram, Whatsapp and even Line! 

We definitely need more awesome plus size stores like this in Malaysia and I'll surely return to show my support in the future! :)

Plus-o-meter: 5/5 Stars

Check out Trendy Confessions: http://www.trendyconfessions.com/
Like them on Facebook: http://www.facebook.com/TrendyConfessions
Follow them on Twitter: http://www.twitter.com/TrendyConfess
Follow them on Instagram: http://www.instagram.com/TrendyConfessions


Till next time! :)

Love,
Mabel.

Aug 11, 2013

Hello lovelies! How has life been treating you? With the holidays in full swing, I've decided to snap and post a few outfit & beauty posts to revive this blog. 

So recently, I've been inspired to focus on a single piece and create multiple looks for a variety of occasions. My first experiment is this basic tankdress with a polka dot print. I've had this tank for ages and lately discovered how versatile it is.

I purchased the tankdress from Mirrorcle in Fahrenheit 88, which carries Korean/Taiwan inspired fashion pieces. They've got a branch in Tropicana City Mall as well.


Featured item: Polka Dot Tankdress, RM29.90 from Mirrorcle (Fahrenheit 88)


Jeans: New Look UK,  £10
Belt: H&M UK,  £2
Bag: Gift from a friend
Shoes: Forever 21, RM49
Necklace: Charmz Paradigm Mall, RM8

Laidback & casual, the first emsemble is something I would wear on a mall shopping trip, movies or an outing with the girls.


White shirt: Brands Outlet, RM35
Celine Inspired Bag: Glossy Addiction, RM79
Shoes: Ti Amo, RM59
Ring: Lovisa, RM10

Time to get dressed up with a white button-down loosely tied at the waist, a structured bag and nude heels. Perfect for a special night out or drinks with your significant other.


Cardigan: Kitschen, RM49
Belt: Jusco, RM10
Bag: Glossy Addiction, RM62
Shoes: Vincci, RM42

Time to get working by layering on a cardigan, skinny belt and no-nonsense pumps.


Inner shirt: Jessabella Pluz Size Stealz, RM15
Bag: Gee Bag in Sungei Wang, RM35
Shoes: Random shop, RM50
Hello Kitty Glasses: Belongs to my younger sister

Bring out the inner child with a uniform-inspired look, a satchel bag and sneakers. In fact, I used to wear something similar back when I was studying in the UK (minus the glasses)!


With Shu Pin on the superbly clean grass!

Well I hope you've enjoyed reading this post as I have enjoyed creating it - let me know what you think in the comments below! :) I will be brainstorming for more similar ideas and content really soon.

Thank you & if you're celebrating, Selamat Hari Raya! :)

Love,
Mabel.

Jul 3, 2013

Well, hello there! I'm back after a long hiatus (due to laziness mostly), and I figured it was apt to begin with the obvious. My colleague is still not used to the sight of me, and whenever I smile he goes "What's new?".

Yes, I've got braces. Adult braces, to be exact - because well, I have officially entered the era of responsibilities, fast lanes and ka-ching! Which was one of my main reasons to finally bite the bullet and get metal contraptions to my teeth, at a much much later age than most of my peers. Budget was an issue during my high school days, and my dentist insisted that braces were not necessary as my condition was not overly severe.


But for vanity sake, I went ahead and got braces anyway. Don't judge. And don't get me wrong - it was tough dealing with the fact that these tiny little metal torture devices would be in my mouth for a whole TWO years. It took quite a lot of positive energy, closed smile practices in front of the mirror and sneaky stares at Julia Robert's perfect teeth.

Oh, and also because I had an initial sibling discount on the account that my younger sis started wearing them as well.

Here are some photos of my overbite and overlapping teeth:


After enduring the photos, it was time to get rid of the rabbit front teeth teeth and crooked bottom row, once and for all.

The first appointment was easy: I visited the orthodontist for a consultation and took some measurements of my teeth and placed a gum like paste over both the top and bottom rows to create a mould. She also took photographs and set me up for an X-Ray.


After reviewing the X-Ray, she sent me to extract one tooth. Only one, thankfully, as I had previously taken out three pre-molars while growing up due to overcrowding and lack of space in my tiny mouth.


Would you look at the size of that?!


One week after the extraction, I went back to the orthodontist to place separators, which were basically tiny little rubber bands in between my molars on each side, upper and lower. They created some space to place the brackets (little metal bands for the braces to adhere to).

And I'm not gonna lie - those separators - tiny as they may seem - were pretty painful. I had them on for a week, and towards the 3rd or 4th day, it was quite a challenge to chew with my back teeth.


After that, it was CRUNCH TIME! Here's what I remembered about the entire braces procedure:

Lots of sharp tools poking in my mouth, water and air being blown into my mouth at intervals, and a weird gummy, metal taste afterward. The procedure took about 30-40 minutes, tops. I had a difficulty saying 'Thank you' to the orthodontist but she was probably used to patients talking all funny while leaving the office, so she just chuckled and waved.

I didn't forget to ask if I could still eat after that. There was an extremely delicious dim sum place nearby!

If you'd like to know more about the braces procedure, here's a Youtube video you could watch: 


There are also tons of helpful Youtube videos on types of braces, how to care for your braces, and more!


As for the rubber band colours: I chose metallic grey as I wanted something subtle, since my graduation was literally two days away. It turned out to be not the best choice as the metal reflected light and made me look as if I'd just chewed R2D2 and had residue all over my front teeth.

Many people asked about the pain - and I would say the first week is definitely the worst. Imagine being hit in the mouth with a baseball bat. Okay, maybe not to that extreme, but it did feel relatively uncomfortable to chew, talk and brush. I found that dental wax (provided by your ortho) helps relieve the rubbing of metal against the inside of the mouth, and when the pain became unbearable, some Uphamol / painkillers did the trick.

But once the first week has passed, my teeth grew accustomed to the wires and I could chew normally. I would say the pain varies depending on the severity of your teeth.

For brushing, a special toothbrush is provided as well as mouth rinse and a braces care guide. Instead of using the toothbrush given by the ortho, I found that brushes with slim bristles (0.1mm or more), such as the Colgate Slim Soft, work better to get into hard to reach areas.

I also keep a spare toothbrush in my office just in case of brushing emergencies (eg: heading out for a meeting, spinach stuck somewhere unimaginable, etc).

Here's a helpful video if you have just started wearing braces and would like to know how to deal with common braces problems:

\

For month 2, I went with light purple which was definitely more subtle and wearable. I also noticed my front teeth getting slightly straighter and my bottom teeth slowly aligning.


Here's the most recent photo - with a much thicker wire compared to month 1 and 2. My rabbit teeth seem to be cooperating and my bottom row is definitely showing improvement.


Above - Weekly comparison during my first month with braces.


Comparison - first and third month.

And here's how I look with braces on:


Overall, I would say that the discomfort is definitely worthwhile - I can see the changes in a mere 3 months and I really hope it would improve the quality of my bite as well as smile. 

For the total cost, I paid RM2k upon installing the braces, RM250 for the X-Ray and I also have to pay a monthly payment of RM150 for braces tightening.

Do stay tuned for more updates as I trudge along this braces journey! If you have any questions at all, leave them in the comments below. :)

Million thanks for reading! Till next time.

Love, Mabel. xx

Apr 13, 2013

Stepping into a dressing room can feel like a collision between heaven and hell. Some days, you wind up with the best fitting clothes while on other occasions, nothing seems to want to look right on your body.

Last weekend, it was that time of the month to battle with the wrath of the dressing room. I have to admit, like many other girls out there, I indulge in the satisfaction of snapping away (unless there's a mile-long line queuing outside, of course). If you can't have it, at least you've got a photo of it!

I've also recently been watching 'Inside the Dressing Room' vlogs featuring Amanda from Fashion, Love and Martini's. I love the concept but to actually film in our dressing rooms would actually be a challenge. So, photos will have to do for now.

My colleague mentioned that Brands Outlet was having a 'Buy 1 Free 1' sale at only RM69.90 for formal/sheer blouses, so I headed over to the Paradigm outlet for a spin. They had a huge selection of shirts: from casual button-downs to checkered boyfriend shirts to formal blouses. 

I selected a few from the racks, and here's the outcome:


Shirt #1: Sheer cotton blouse with studs on the sleeves and collar.

I loved the flowing material that oozed sophistication yet effortlessly casual for work and play. Fit-wise, it was loose on my body but just right around the arms. The only downer would be the wrinkles that came with the package, which meant more ironing. (insert collective sigh here)


Shirt #2: Formal sheer button down blouse with lined pockets and puffed sleeves

This one looked awesome on the hanger, but when I tried it on, it was a wee bit tight around the boobage area (another collective sigh). Unfortunately, I couldn't go up a size since the largest was XL. A shame, indeed.


Shirt #3: Semi-sheer button down top with electric blue sleeves

Yet another disappointment due to Mr. Boobage there. But I loved the colour combination on this blouse - one of my favourite combos, anytime!


Shirt #4: Black cotton shirt with rolled-up sleeves and tiny buttons down the front

The first thing I noticed when trying this on was the super comfy material! I almost bought it just for that reason. Only...the cutting on the top was slightly off, and if I'd bought it, I would have to fix an extra button between the first and second buttons to avoid looking like a nun (sorry don't think that made any sense but yeah). This was a no-go for me either.


Shirt #5: Electric blue cotton blouse with studs on the sleeves

I can NEVER get enough of this colour. And Mr. Boobage strikes again! The sleeves alone were a definite yes factor. Oh well.


Shirt #6: Casual printed button-down denim-like blouse with functional pockets

Denim is BACK, and here to stay. This blouse looked amazing on the mannequin, and I started playing out all the possible outfit combinations in my head even before entering the dressing room. However, once I put it on, it didn't seem right, and the material was a bit too stuffy for my taste. Loved the print and style though, but this just wasn't meant to be (cue sobbing fest).

My Thoughts:


To sum it up, I picked up the Shirt #1, and almost bought Shirt #4 and #6, but ended up sharing the Buy 1 Free 1 deal with my sister instead. But I couldn't get enough of the shirts, so I went to the Sunway Pyramid outlet and bought 2 more shirts (which may appear in future outfit posts, maybe). 

The only downside would be the limited sizes - the largest size is XL - however, keep searching and you might just find the right cut to flatter your body shape.


Since we're on the topic, I went to Padini a couple of weeks back and snapped up these two blouses! All hail the long-sleeved sheer blouses trend!

Left: Nude sheer formal top with white collar
Right: Semi-casual sweater with sheer coral sleeves (love this!)

My Thoughts:


Unlike Brands Outlet, Padini carries many brands varying in sizes and measurements. These two blouses were from the Seed line, and available in up to Size 10 (not sure about the equivalent in UK or traditional sizing). They also have Buy 2 for RMXX promotions that run from time to time.

Some Dressing Room Tips:


  1. Before battling the dressing room, be prepared! Try to wear a black tank top or camisole underneath. Not only will this be more sanitary - it will give you an idea of the coverage you need for sheer tops/low cut dresses.
  2. Keep it bare! Remove all earrings, jewellry and accessories to avoid snag and tear incidents.

Well, we've reached the end of my first Inside the Dressing Room (Plus Size Edition) post. Let me know what you think about this series, and hope to see you around soon!

Till then, stay gorgeous!

xoxo
Mabel

Apr 6, 2013

Beauty subscription boxes are literally, everywhere these days. What sets a box apart? For me, it's the concept, followed by the brands.

So when The Lilac Box first hit the market, I was drawn in by the unique 'Blind Date in a Box' idea (how cute!). But truly, the ultimate surprise was unveiling the brands in the box, mainly higher-end premium brands such as Roberto Cavalli, Kerastase, Burberry, Jimmy Choo and more. 

When subscription opened for Box 2, I jumped at the opportunity. For a price of RM49.90, it's comparably steeper than other boxes, however I liked the notion a one-month-only subscription, no strings attached for three months or six months like some similar boxes.


Upon receiving the box, the first thing I noticed was the weight of the box. It felt really heavy! 


Pretty, nondescript and solid brown box with a lilac bow.


Another thing that struck me immediately was the sweet floral, feminine scent emerging from the box. The interior looked like a nature's dream with the acid green wrapping paper.

What a nice touch!


An incredibly sweet note from the 3 guys who founded The Lilac Box.

Simply fantastic!
Items in the Lilac Box 2:

  1. Calvin Klein Beauty and Sheer Beauty - RM200+
  2. Redken Intra Force Shampoo 145ml - retails for about RM35
  3. Redken Intra Force Conditioner 145ml - retails for about RM35
  4. Nuxe Huile Prodigeuse - full size available for about USD$30
  5. Nuxe Rêve de Miel Cleansing Gel - full size available for about USD$26
  6. Lunasol Skin Modeling Powder Foundation and Smoothing Makeup Base - retails for about RM200+


The variation of Redken shampoo & toner (conditioner) I received is intended for colour-treated thinning hair, probably because I selected 'coloured and damaged hair' in my Lilac Box Beauty Profile. 

According to the Redken website, the Intra Force shampoo detoxifies and gently cleanses to reduce excess sebum while promoting a healthy scalp and safeguarding hair colour.

More than 70% of users have claimed to experience increased fullness, hair density and a thickening effect after using this shampoo.


I have yet to try out this shampoo and toner combination, however, the scent smells spicy and refreshing - and the travel size would definitely come in handy on road trips. I will definitely to whip out this shampoo after making a trip to the salon to touch-up my ghastly overgrown black roots.


Reviews on Make Up Alley rated this cleanser 4.2 out of 5 stars, and users remarked that the cleanser is perfect for dry skin in the winter months. 

I love that this is yet another curated product for my dry skin and sensitive skin, and will try this out to testify if it holds true to it's promises!


The Nuxe Huile Prodigeuse Multi-Usage Dry Oil claims to nourish, repair and soften skin. Better yet, it's a triple threat - suitable for face, body and hair! 

Personally, the idea of using oil anywhere on my body (except for makeup remover) is a little intimidating, but this tiny bottle might just be an elixir of life to revive my terribly dry skin. 


Hah - I've found the source of that sweet, lingering, almost mysterious scent. Not one, but two sample size Calvin Klein Sheer Beauty perfumes!

Comes with an EDT spray/vaporiser (White) and EDP spray (Black). Definitely saving this for special occasions! Subscribers of The Lilac Box can also head over to the Calvin Klein counters for an exclusive gift with purchase.


What? There's more? I've seen this Kanebo Lunasol foundation in a couple of beauty boxes, but this is the first time that I'm receiving one. Reviews rate it as the most skin-transforming powder foundation, even better than Dior or Chanel!

Although I'm not a huge fan of powder foundation (more of a BB Cream hoarder), this is worth giving a try. The shade looks a tad too orange for my skin tone, but we shall see.


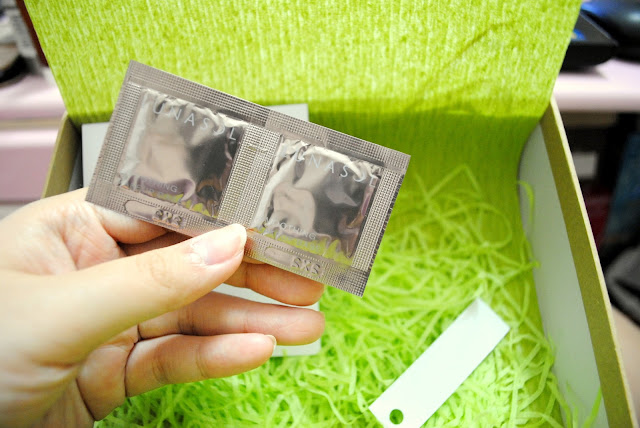
Topping it all off, there's two sachets of Lunasol Smoothing Makeup Base to prep the face for foundation. Woots for flawless skin!

Overall, I'm pleased with this month's blind dates from The Lilac Box. Most of them are indeed blind dates for me - but incredibly pleasant ones! Keep it up, Lilac Box! Stay tuned for more reviews and updates on these products as I take the time to get to know each of them personally.

Head on over to The Lilac Box and create an account to get firsthand updates on Box 3!

Thank you for joining me! :)

xoxo,
Mabel.

*All items were purchased with my own money.

Sharethis

 
© 2012. Design by Main-Blogger - Blogger Template and Blogging Stuff